
Lesson 1: Free Preview (Limited Time)
■ INTRODUCTION: Why does background blur make a photo look so good?
“I took a photo, but the background is so cluttered that the main subject doesn’t stand out…” Have you ever had this experience?
When you look at photos you find beautiful, do many of them have a soft, dreamy blur in the background?
By blurring the background, the main subject of your photo stands out, and the viewer’s eyes are naturally drawn to it. This creates a look that is almost like a painting.
In this lesson, you will take your first step toward mastering “Bokeh” (blur) using your own camera.

■ 1. What is “Bokeh”? How does it happen?
“Bokeh” refers to the phenomenon where parts of an image outside of the focus area appear soft and blurry. It might sound technical, but the principle is actually quite simple.
Just like our eyes, a camera lens has a part called the “Aperture” that controls the amount of light coming in. By opening or closing this aperture, you can change the level of blur in your photo.
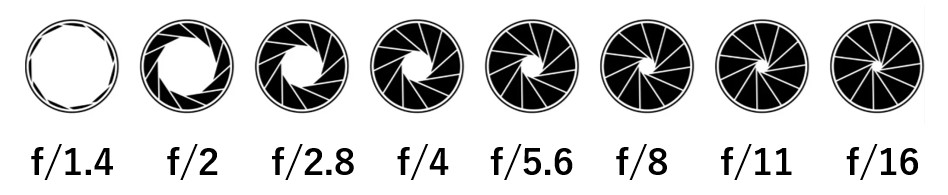
F-numbers like 1.4, 2, 2.8, 4, 5.6, 8, 11, and 16 are representative values for standard lenses. These are essential numbers for learning photography, so you’ll want to memorize them eventually.
One tip for memorizing is that they roughly double every other step:
F1.4 → F2.8 → F5.6 → F11…
F2 → F4 → F8 → F16…
Depending on your camera and lens, you might see intermediate numbers like F1.8 or F3.5. These are simply subdivisions of the main values. Some lenses even go as low as F1 or F0.95, while others go up to F22 or F64.
[ Let’s visualize it! ]
・”Opening” the aperture: The hole in the lens gets bigger → More light enters → The background blurs more easily.
・”Closing” the aperture: The hole gets smaller → Less light enters → The background blurs less (easier to keep everything in focus).
The value that shows how wide the aperture is open is called the “F-number” (or F-stop).
・Smaller F-number (e.g., F1.4, F2.8) → Aperture opens wide → Background blurs more.
・Larger F-number (e.g., F8, F11) → Aperture closes down → Background blurs less.
Remember this slightly strange relationship: The smaller the number, the wider the opening! Hint: Think of F1 as being as bright as the human eye—it’s very bright!
■ 2. Camera Settings for “Bokeh”: Using Aperture Priority Mode
Now, let’s try to blur the background with your camera. There is a convenient mode that lets you adjust the aperture yourself. It’s called “Aperture Priority Mode.”
Look at the dial on your camera. Can you find the “A” or “Av” mode? This is Aperture Priority Mode (A-mode). Follow these 3 steps:
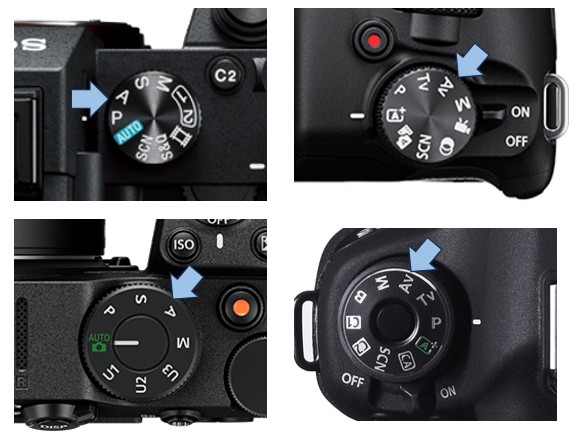
① Set the mode dial to “A” or “Av” Now, when you set the aperture (F-number), the camera will automatically adjust the shutter speed and ISO.
② Try a smaller F-number Turn the camera dial to the smallest number available on your lens (e.g., F1.4, F2.8, F3.5, or F4.0).
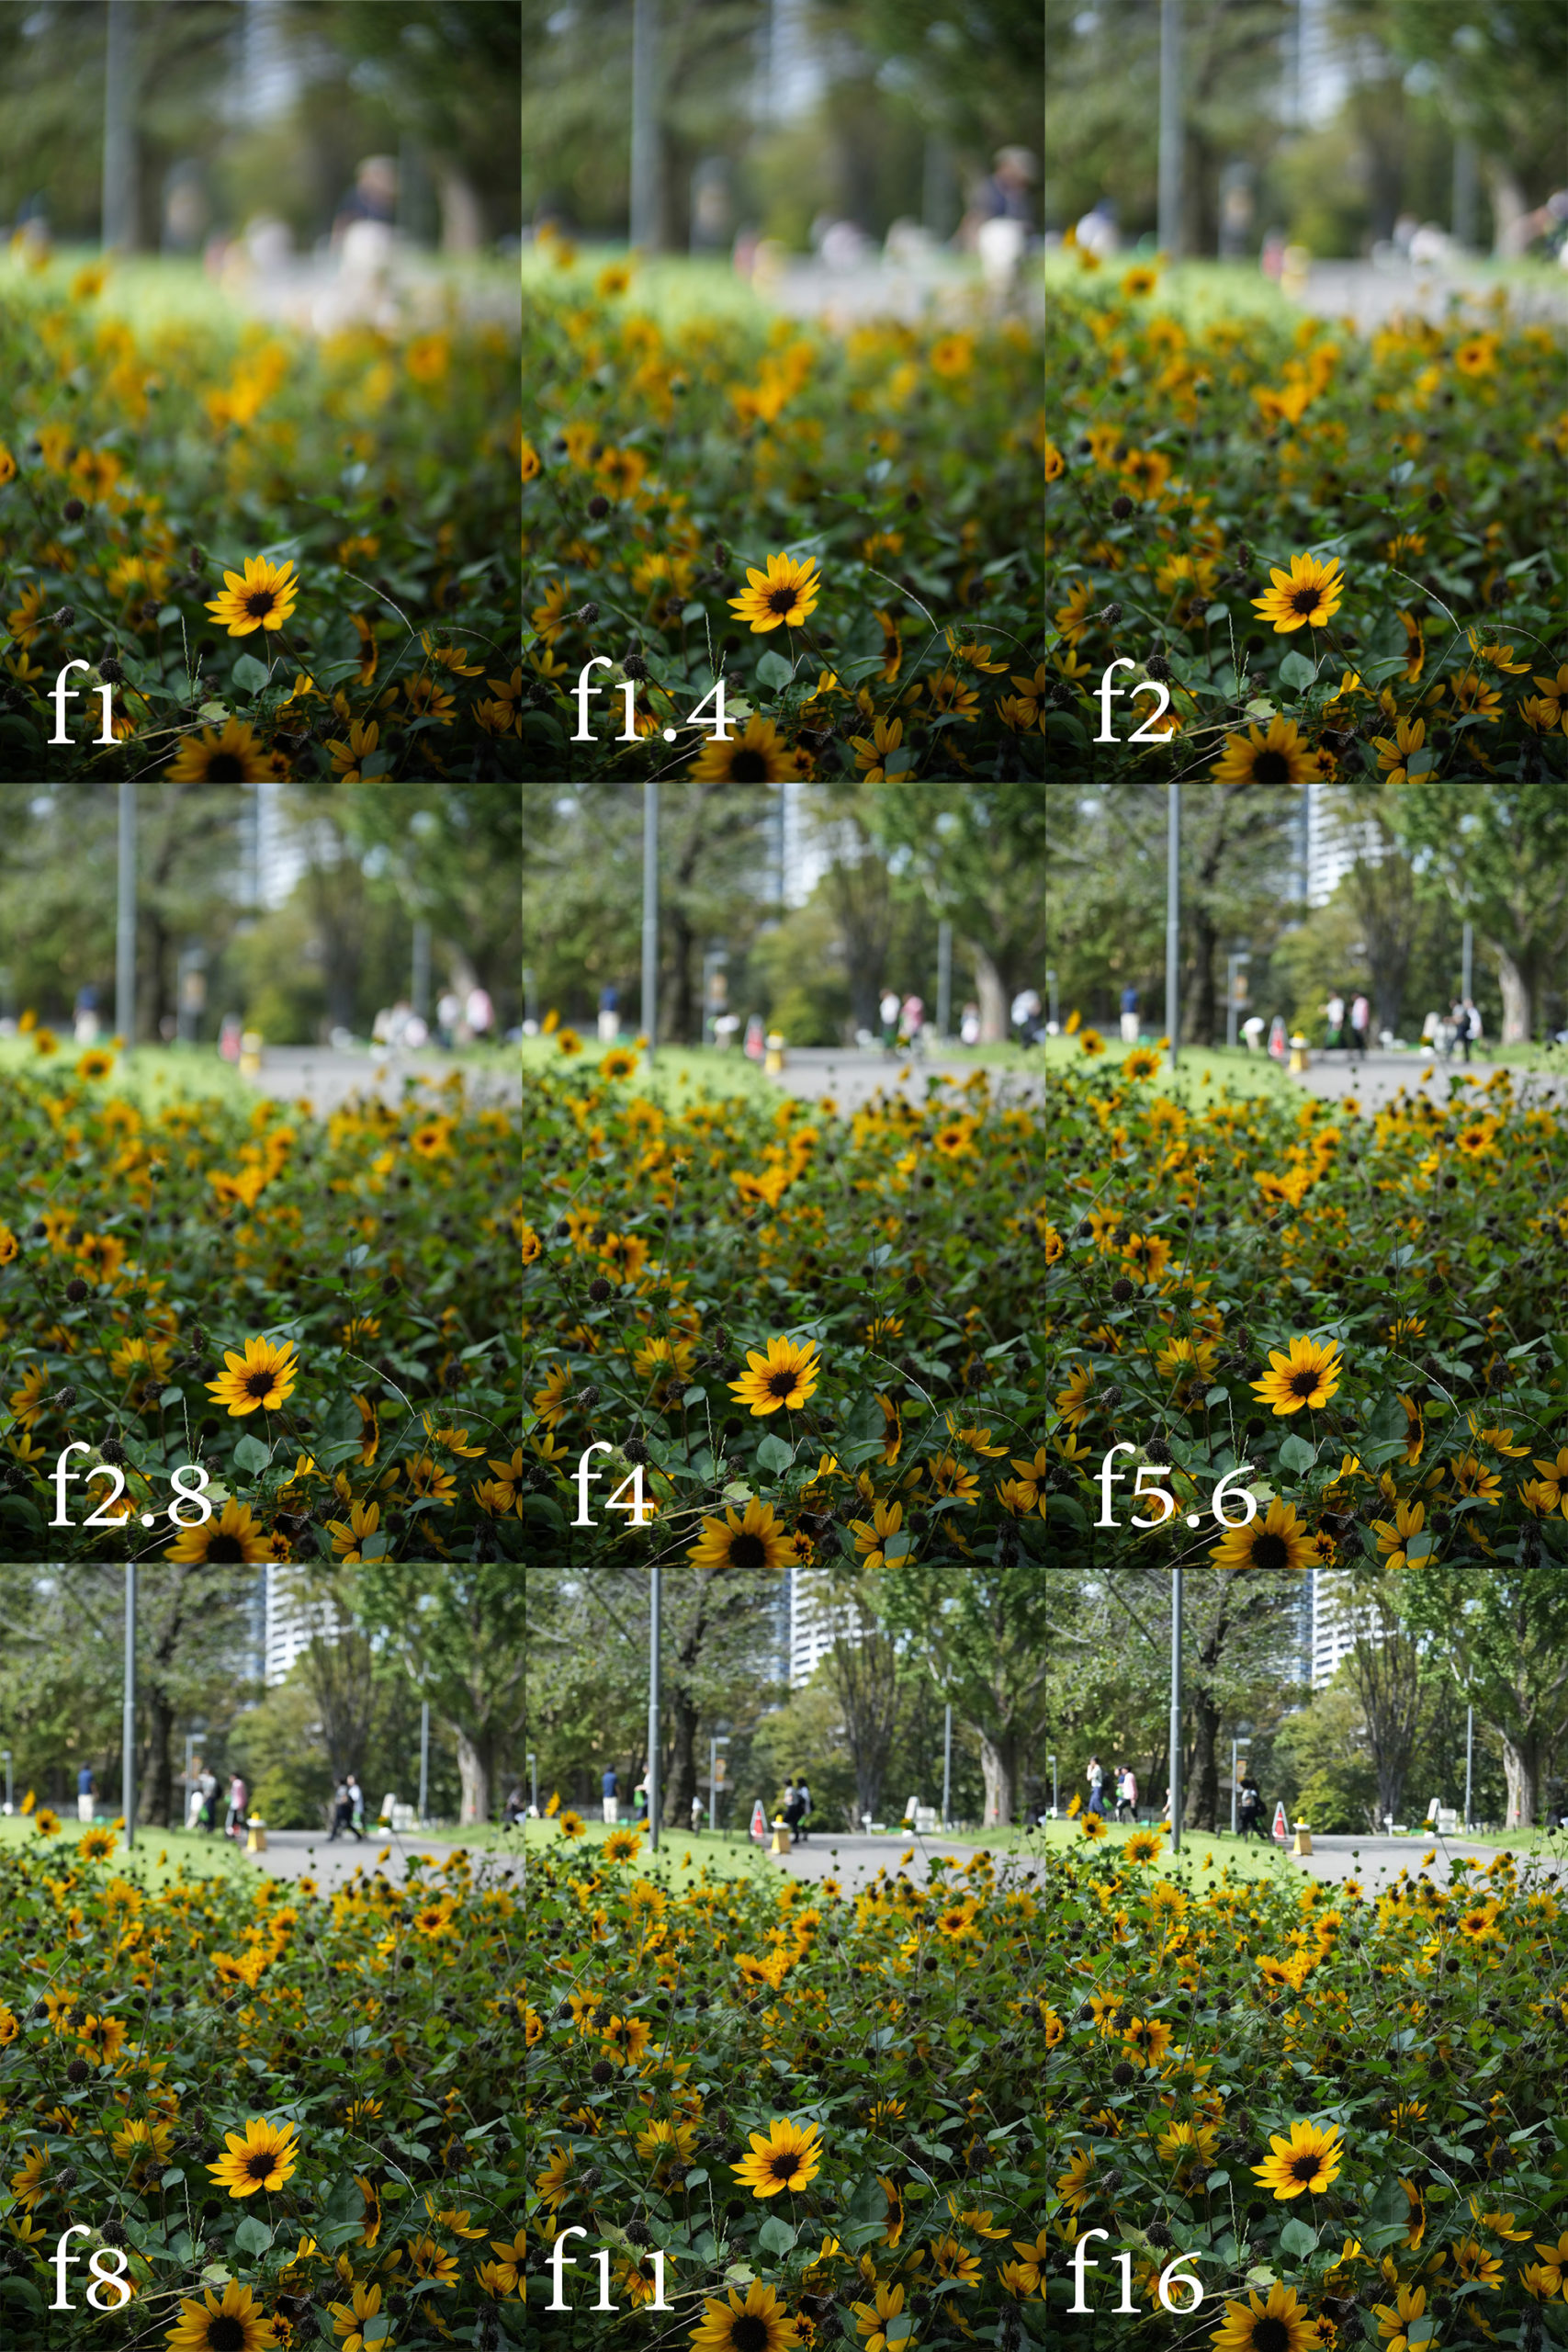
③ Press the shutter button halfway to confirm Look through the viewfinder or at the screen and press the button halfway to focus on the subject in front. If you are too close, it won’t focus, so try backing up a bit. You should see the background become soft and blurry.
[ Practice Tip ]
Try taking photos of an object or flower indoors where the background is some distance away. Compare the “Bokeh” effect when using the smallest F-number versus a larger one (like F8 or F11).
■ 3. Three Other Ways to Increase “Bokeh”
While a small F-number is the most important factor, there are three other ways to get even more blur. Combining these will lead to impressive photos.
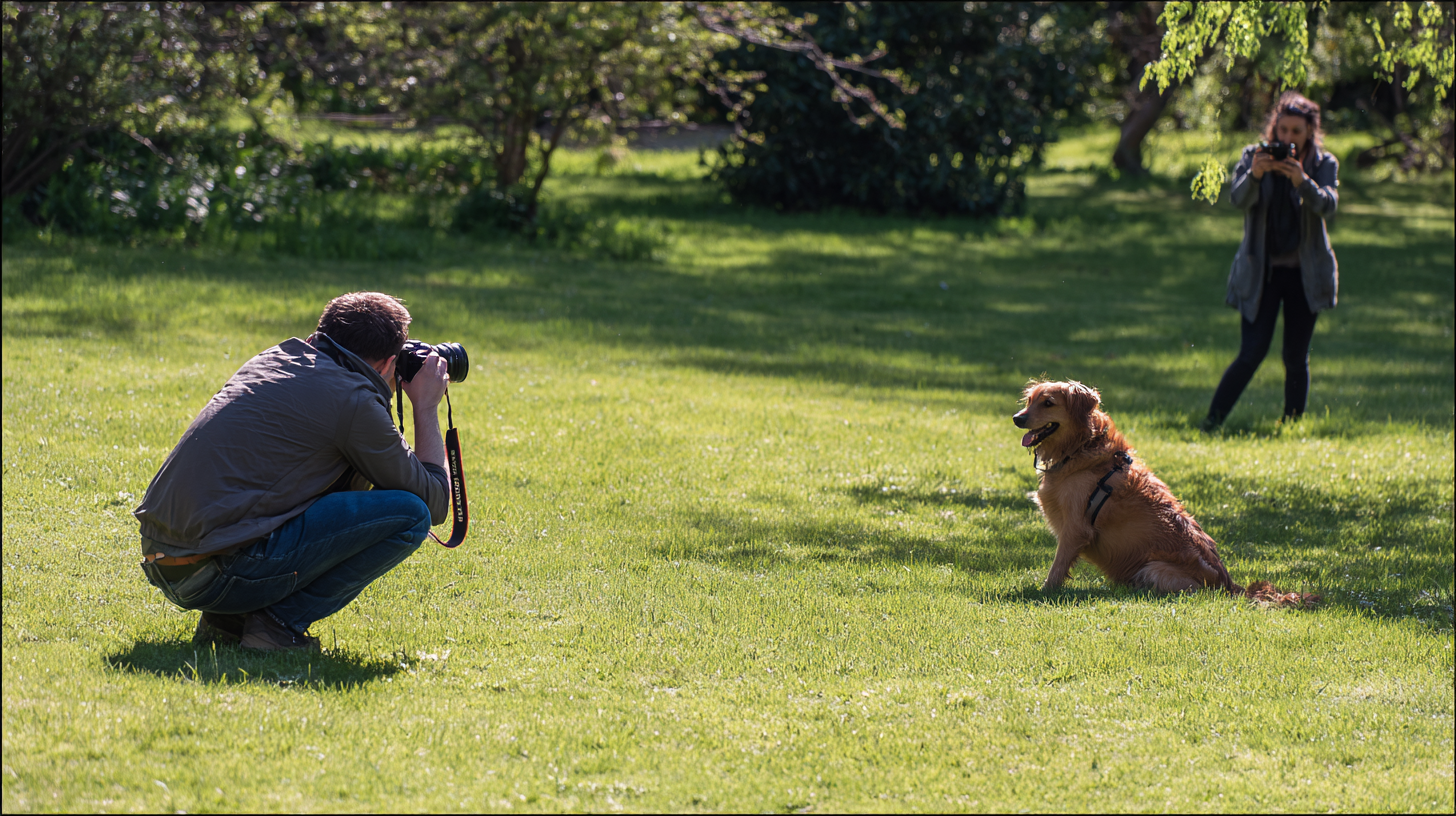
① Increase the distance between the subject and the background The further the background is from your subject, the more it will blur. Practice: If you’re shooting flowers, choose a spot where the scenery stretches far behind them rather than a spot with a wall right behind.
② Get closer to your subject The closer you are to what you’re shooting, the more the background will blur. Practice: Take a step forward and get your camera close to the flower. Just watch out for the “minimum focus distance”—if you’re too close, it won’t focus.
③ Use a Telephoto lens (Try zooming in with your kit lens) Telephoto lenses blur the background more than wide-angle lenses. Practice: If you have a zoom lens, try shooting at the highest mm number (the telephoto side). Even at the same distance, the background will appear more compressed and blurry.
[ Advanced Tip ]
Combine these! Set a small F-number, keep the background far away, get close to your subject, and zoom in. This will give you the best “Bokeh” possible!
■ 4. PRACTICE CHALLENGE: Let’s blur something around you!
Now it’s your turn. Start noticing the “Bokeh” in your daily surroundings. Try to balance the distance between the camera, the subject, and the background.

Ideas for practice:
- Your favorite item in the living room: Place it by the window and blur the curtains in the background.
- Flowers in the garden: Keep the house or fence far away to make the flowers stand out.
- A coffee cup at a café: Focus on the cup and blur the tables or people behind it.
- Children or pets in the park: Set a small F-number, get close, and blur the playground equipment.
Compare your shots. You’ll notice how much the impression changes just by adjusting the F-number or your distance.
■ 5. SUMMARY: What we learned today
● Bokeh makes the subject stand out and creates a great atmosphere.
● Small F-number = More blur.
● Use Aperture Priority Mode (A or Av) to set the F-number.
● Three ways to boost blur:
1. Move subject away from background,
2. Get closer to subject,
3. Zoom in.
In this lesson, you’ve taken your first major step in expanding your photographic expression!
In the next lesson, we will learn about “Light,” which dramatically changes the impression of a photo.
Enjoy the world of Bokeh!
Print your photos or post them on social media to share the “atmosphere” you’ve captured.